


Tavarish’s VQ35 Swap How to:
Acronyms
4th gen = 1995-99
5th gen = 2000-03
FSM = Factory Service Manual
00VI = 2000-01 Intake Manifold
This how-to depicts how I did the swap. I am by no means responsible for what you do to your car, and any ill effects are your responsibility. I take credit in writing this how-to, and please do not use it without the author’s permission.
2.Getting started
So you’re ready to get rid of that old outdated 3.0 and put in a brand spanking new low mileage VQ35DE? You’ll have to get a few things before you start the swap.
Tools – I suggest about 2-3 sets. With tools scattered around everywhere, and possibly 2 people working on the car, tools have a tendency to disappear. (gremlins) Have a few sets handy for efficiency and less frustration during the swap. When you clean up, you’ll find them all, I promise. What you’ll need is a torque wrench, breaker bar, screwdriver set, Allen key set, 8mm, 10mm, 12mm, 14mm, 17mm, 19mm, 20mm, and 24mm sockets. Air tools are a plus. You’ll also need a cherry picker (engine hoist) with an engine leveler. A Dremel (rotary tool) and Drill are worth their weight in gold in this swap. Jack stands and a hydraulic jack are needed to lift the car up, and possibly support the engine/tranny from the bottom. Also needed is RTV sealant, wire ties (to clean up wires, vacuum hose, a can or two of WD-40, and 80-grit sandpaper.
Space – you’ll need space to work for a few days, make sure it’s ready in case you spill oil or other fluids on the ground, engines tend to spill coolant all over.
Clean-up gear – I suggest brakleen for the engine parts (degreases) and Simple Green. Put some old towels underneath the working area to control any spills. Wear gloves for easier hand clean up, I recommend Mechanix gloves, or disposable latex gloves. A shop vacuum helps with cleanup as well.
Manuals – The Nissan Factory Service Manual and Haynes were at my disposal, and helped me out in a few instances.
FSM can be found online: www.phatg20.net – a must have for this swap!
Engine – You can find these pretty easily; it all depends on the mileage you want, and the condition, and what the engines come with. I bought my engine for $650 shipped with harness and 3.5 engine cover, and a 1-year warranty.
Tranny/clutch – you can use your stock 5spd or auto trannies. 5spd, I recommend an upgraded clutch, I got my Spec Stage 2 for $295 shipped. 5th gen (2000-2001 OEM isn’t enough in my opinion) You can use any flywheel for the 4th gen, stock or aftermarket, and you’ll need it, because the 3.5L flywheel is different, and doesn’t bolt up to the 4th gen 5spd. Auto, I recommend a high-stall torque converter, upgraded valve body, tranny cooler, and possibly Jime’s drop resistor mod. When you have a vq35 and auto, it will hold the power if you floor it FROM A STOP. If you have a stock auto tranny, do not WOT downshift much, or else you’ll burn out your clutch packs and the tranny will slip.
Cam adapters – These are so the vq30 timing components work on the vq35 cams. You can get these for 100 shipped from Rob Tilley (tilleys99 on maxima.org), or Stephen Max on maxima.org. I’m trying to make my own set, so I don’t have to go to a third party to get them.
IACV adapter – This is so you can use your 4th gen Idle Air Control Valve with the 3.5. This is optional, as I don’t have it installed on my car.
If you have everything ready, let’s start the swap!
Procedure
1.Remove the engine
Turn off the car, remove the battery terminals and any extra grounds you may have.
Remove the air box assembly and put it in a safe place, you might want to use it again.
Under the air box assembly, you’ll see the starter connected to the tranny. Undo the 12mm nut connecting the power to the starter, and disconnect the ground for the starter (plug). Loosen and remove the 2 17mm bolts on the starter. The bolt in the back is the long one. You should be able to shake the starter loose and take it out of the engine bay.
Raise the car and place it on jack stands. Remove both the front wheels. Remove the 36mm axle nuts (air tools are pretty much a must, as you can remove it with a lot of WD-40 and a breaker bar, but you need the brakes to be pressed or else the axle will move) and remove the 2 bolts on the strut. One side is 17mm; the other side is 19mm.
Use a flathead screwdriver to lightly tap and take off the retaining clip on the brake line located on the strut. If you have ABS, take off the 10mm bolt on the strut for the ABS. The spindle should come down freely now, and with a rubber mallet, tap the axle out of the spindle. The driver’s side axle should come out without too much fuss, just pull it back a few times, and it should pop right out.
The passenger’s side has been a point of frustration for many people, due to the axle not coming out of the bracket. I’ve never had a problem with it, but the bracket holds 3 12mm bolts. Take these out, and you should be able to pop out the axle just like the driver’s side. If it won’t budge, take out the 3 14mm bolts attaching the bracket to the engine, and the whole assembly will come out. Make sure you have something to hold the oil; some tranny fluid will leak out of the axle seals.
While you’re down there, why not drain the oil and coolant? Remove the oil drain plug on the oil pan, and remove the oil filter.
Remove the radiator drain plug (Philips head screwdriver), and drain the coolant. Remove the 2 10mm bolts on top, disconnect the hoses from the engine, and remove the harnesses to the fans, and slide the radiator out of the engine bay.
Drain the tranny fluid, there’s a spot covered with a 10 mm bolts, connected to the shifter indicator pull it out, and the whole tranny should drain.
Now it’s time to remove the harness. Remove all the sensors in the engine, and put them to the side. There will still be a harness at the back of the engine, but we’ll keep that on for now, it’s the injector sub harness.
Remove the power steering lines; disconnect the one from the pump to the reservoir, making sure to have a rag to soak up the runoff. Also loosen the 24mm high pressure line for the power steering. This bolt is a bit stubborn, but it’s definitely able to loosen. Make sure not to lose the upper and lower gaskets for this bolt, because power steering leaks aren’t the prettiest.
)
Remove the O2 sensors (I use a 7/8” open ended wrench) and remove the y-pipe. There are 8 bolts, 14mm if you have an aftermarket y pipe (as you should), and 10 bolts, 8 14mm, and 2 12mm bolts holding in the y pipe.
Remove the shifter linkage (5spd) bolts on the bottom of the tranny, and let the shifter linkage hang there. If you have an automatic, remove the 2 shifter cables from the front of the tranny.
Taking advantage of being under the car, you can loosen and remove the 14mm bolts on the bottom of the tranny. There’s one 17mm bolt all the way in the back of the tranny, it’s kind of hard to spot, but you need to get it out. The bottom 14mm bolts can’t be taken out (crossmember’s in the way), but you can loosen them enough to take the tranny off. Get out from under the car, and remove the remaining 17mm bolts on the top of the tranny, you can remove these very easily with a breaker bar or air tools, you’ll have enough room. Now it’s time to support the tranny with a hydraulic jack (or engine hoist if you are so inclined, as was I) and take off the mount bolts (14mm). Use a flathead screwdriver to get in between the engine and tranny, and pry until the tranny is loose, then ease it out and lower it down, out of the car.
Next, disconnect the feed and return lines for the fuel, and disconnect the coolant hoses coming from the firewall. It’s easy to do this from the side of the engine.
)
Now here’s the (first) fun part: taking out the VQ30DE!!!!
Get your cherry picker engine hoist. Hook up the engine leveler to the engine. Here’s what I did. There are 4 points of contact. Bolt it onto the 2 14mm bolts on the timing chain cover, right above the motor mount, and the remaining two, bolt them onto the 17mm bolts for the transmission bellhousing. This should provide a pretty sturdy base to hold the engine. Make sure no fuel lines are kinked, and make sure there is ample clearance for the chains, and none of them bind.
)
Connect the cherry picker, and apply just enough pressure to hold the engine without it falling. Now, some brave soul (me) must go and disconnect the 17mm bolts that hold the crossmember on. Also, remove the 17mm motor mount bolts. Use a LARGE breaker bar, on in my case, a good impact wrench. There are 2 17mm bolts in front for the crossmember, and 2 in back. Be careful that you’re not underneath, it’s pretty heavy. When you disconnect all motor mounts and the crossmember, move it out of the way. You’re almost there. Well, almost halfway.
)
Disconnect the 14mm bolt and nut from the remaining motor mount, and now the engine should be entirely supported by the engine hoist. Carefully lift it up, making sure that it is not binding anywhere. You don’t want the engine falling. Lift it until you can roll the engine hoist out of the way.
)
)
)
)
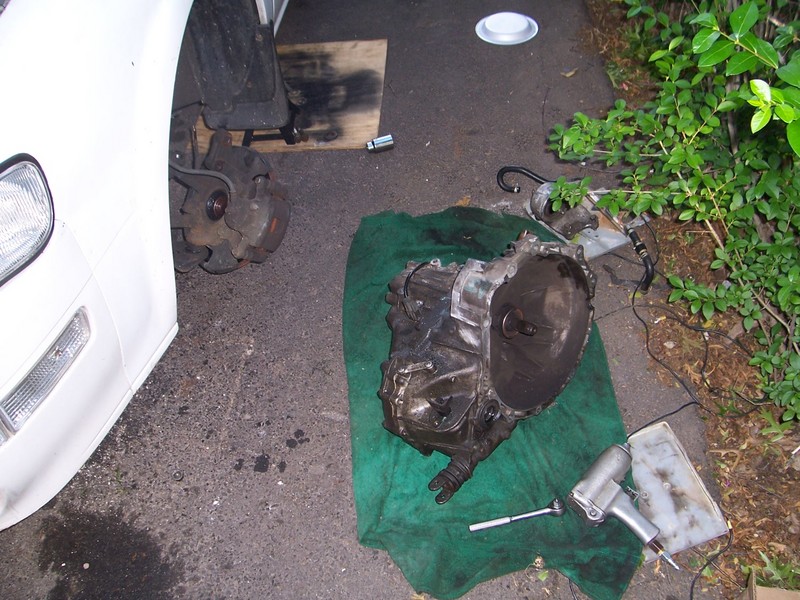
Put the engine down, and take a break and get a drink. You just took an engine out of a Maxima.
Here are the meat and potatoes of the swap: Changing out the timing components.
First thing to do is remove the engine mount that sits on the timing cover, the crank pulley (20mm), and remove the various 10mm and 12mm bolts that there are. To fully remove the timing cover, you need to remove the lower oil pan, (all 10mm bolts), but be careful that you pry with a very small flathead screwdriver, and make sure not to dent. This can leak VERY easily if it’s dented and it goes back on the car. You can use either the 3.5 or the 3.0 lower oil pan (just the drain plug is different), it doesn’t matter, so if you mess up and kill one oil pan, don’t sweat it, just don’t do it again.
When you remove the oil pan, there are 2 12mm bolts holding the inner timing cover on.
Remove these, and pry the outer timing cover off. I recommend using a pry bar on the side where you can get some leverage, and be very gentle. Although it is aluminum, it can easily crack. The factory sealant that Nissan put is very strong, so give it a good 5 minutes of work to completely remove it. There are 2 dowels at the bottom of the timing chain cover that you need to clear for it to come off. It must come off these dowels at exactly the same time.
When the timing cover comes off, it should look like this:
)
Now we’ll take off some timing components.
To take off the main timing chain sprockets: open the valve cover (front one will do for now), and hold the intake cam with a 1” open ended wrench. Use a 22mm open ended wrench to take off the bolt. This bolt is TOUGH, but do not use air tools on it. I cracked a cam before, they can be pretty fragile. This part it’s a lot easier to do with 2 people (one loosening the bolt, the other holding the cam.)
Once that’s off, you can take off the chain guides (12mm bolts), and the other cam sprocket in the same manner. Then you can take off the chain. Make very sure of where you put these parts. After you remove the timing chain, you can remove the water pump, which is held on my 3 10mm bolts, and be careful, when you pry it out, a lot of coolant will flow out. Also take off the tensioner (2 10mm).
*side note: You will want to take off the intake manifold to gain access to the rear valve cover, so go ahead and get that out the way. You can cut any vacuum lines, you won’t be using them again, and it’ll be a lot easier. The hardest part about taking off the intake manifold is the removal of the throttle body. It’s connected to coolant hoses, vacuum hoses, and all these will need to come off in addition to the 4 10mm bolts that are on there already.
)
Now we take off the secondary cam gears (exhaust cams). This is a 17mm bolt, and it comes off exactly the way the other ones did.
Now that we have the cam sprockets loose, squeeze the tensioners and hold them there with a thumb tack or small nail (there’s a little hole you can squeeze it into and hold it in place). Now you can simply pull out the cam sprockets from the cams, and the secondary chains with them.
Remove the various 10mm bolts that hold the inner timing chain cover on. Also remove the pieces that go in between the timing cover and valve covers, there are 4 10mm bolts on each.
Remember where you put all of these **VERY IMPORTANT**
Now you can pull off the inner timing chain cover. Use a pry bar, using any points of leverage that you can find. I found the inner timing chain cover was a bit easier than the outer.
Now that you have the VQ30DE taken apart, you guessed it. You have to do the exact same to the VQ35DE. First, make sure the engine is at TDC (top dead center). The way to do this is to line the crank pulley (second mark) with the mark on the water pump drain back plate. This is also explained more thoroughly in the FSM.
I’ll save some space, since it’s the exact same procedure, only the intake cams need 19mm bolts, rather than the 22 on the VQ30DE. The procedure for taking apart the engine is almost exactly the same.
When you’re done with stripping the VQ35DE you’ll end up with something like this:
)
Here’s where you have to CLEAN, CLEAN, CLEAN!!!
Take out your gasket scraper and cans of brake cleaner. Scrape off every last speck of factory sealant (from the block and both timing chain covers) with the scraper (you’ll go through a few blades), and be sure to get in every nook and cranny. A sharp knife will work in places the gasket scraper can’t get to. When everything’s off, go over it a few times with the compressed brake cleaner (it’s non flammable and dries fast, but the cans get used up quickly.)
Mount the cam journals (thing in between the timing cover and valve cover) from the 3.5 on the engine, then test fit the timing cover. There should be two bolts out of place. This is where you must drill to ensure the bolt goes through. Only a small amount needs to be taken away. Make sure you clean any metal fragments that remain on the inner timing cover. While you’re on this step, you can install the cam tensioners from either the vq30, or the vq35, they both fit.
)
)
Make sure you have The O-rings on the engine (the orange ones) before you put on the timing cover. I used Black RTV sealant, and applied a nice, even bead so it doesn’t puddle up and make a mess in places. Oil leaks are the last thing you want when this thing goes together.
Put sealant everywhere designated. If you don’t know where, consult the FSM, but it’s pretty self explanatory. Any small, smooth surface needs sealant. Double check you have everything properly covered with sealant, then *carefully* place it on the engine. Now you secure it with the 10mm bolts. The tightening sequence is pretty important, and you have to torque them down to 10-15ft-lbs. The tightening sequence can be found in the FSM.
After you have the inner timing cover, comes the hardest part: setting the timing.
Get the cam adapters and gently tap them on (the set I got needed some slight grinding with my dremel to make them fit.) They’re a TIGHT fit, so be persistent, but don’t smash them on, the cams could crack, and then you’re S.O.L.
They should look like this:
)
Now you can start putting on the timing components. Put on the timing sprockets, and the secondary chains. Install the water pump. Line up the notches on the sprockets with the marks on the chain. Tighten the exhaust cam sprocket to 85 ft-lbs. It has to look exactly like this, on both sides:
)
Next, put the main timing chain sprocket and crank sprocket on, tighten the main bolts to 85 ft-lbs, and install the chain, making sure the marks on the sprockets and crank line up with the marks on the chain. There are two similarly colored chains, and one “oddball”. The oddball belongs right at the mark on the crank sprocket. There’s an indentation where it belongs, and there are arrows on the main sprockets where the other links belong. This is also outlined in the FSM. If not everything lines up, turn the cam VERY carefully and line it up. Put on the chain guides and tensioner. This is what it should look like:
)
Now that we have our timing set, double and triple check. You might want to move the whole assembly to see that it all moves and doesn’t skip a tooth, it’ pretty easy to mess up in this stage.
Install the outer timing cover, making sure to put a clean bead of sealant on it, and getting rid of any old sealant.
)
Make sure the two dowels go in at exactly the same time, and install all the bolts. I personally didn’t worry about the order of the bolts, I just made sure they were tightened down to 10-15ft-lbs. Be very careful, they can crack easily.
Now bolt up the engine mount, and crank pulley.
Here’s the finished product,
)
Now it’s starting to look like an engine. Next we’re going to install everything else that we need from the 3.0, which are the headers (6 14mm nuts), the AC compressor, PS pump, belt tensioner, both belts, alternator, thermostat, and coolant tube on the right side of the engine (the one that houses the Engine Coolant Temperature Sensor). You need this coolant tube because the 3.5 is missing one sensor the 3.0 has, not to mention the various vacuum lines that run on the top of the coolant tube. This tube can be taken off with 4 12mm bolts. The injector sub-harness has to swapped (in the rear of the engine) and the crank REF sensor has to be installed on the bottom of the crank pulley. Connect the oil pressure sender and run the harness so it doesn’t touch the headers, or the power steering pump.
Cut off the 3.0 injector plugs on the harness and make sure you have a lot of wire on the harness. Now cut the 3.5 injector plugs off, and splice them into the harness. If you’re confused about the power and ground, the red one is always the power. You’re only going to do half of the injectors now, as we’ll do the rest when the engine is in the car.
Now you’re ready to install the flywheel and clutch. Make sure the timing ring is on the flywheel (secondary ring behind the flywheel), or else the car won’t start. Take the flywheel off the old VQ30 by first removing the clutch (9-12mm bolts), then removing the 14mm bolts in the middle, and easing out the flywheel. It’s a bit stubborn, but try and pry it on each side and pull gently. Toss the old clutch, it might as well be a Frisbee now.
You can have the flywheel resurfaced, but mine was in good shape, so I just went over it with some 80grit sandpaper and simple green to get the dirt off. Works like a charm. Install the flywheel on the VQ35, making sure not to get grease on the contact area. Then install the clutch, torquing the 12mm bolts to 35ft-lbs.
Now that that’s installed, we can lift the engine from the same mounting points as before, and install the lower oil pan. As with any old sealant, scrape it off, and make sure the surface is clean and smooth before applying the new gasket. Carefully place the oil pan on the engine, and tighten all the bolts.
Now the engine’s ready to go into the car.
Again, I’ll save some space and write that it’s the reverse of removal, and through experience, I’ve found it’s a bit easier to put the tranny on the engine outside the car, then lower them into the engine bay, both at once.
You can start putting the harness back on, and now you can wire the other half of the injector harness. The coil packs plug right in, just as they should, just make sure not to overextend the wires for the rear coils, there’s not a lot of room to work with. After you run those wires, you can put on the intake manifold.
)
)
Reinstall radiator, hoses, coolant lines, power steering lines, y-pipe, crossmember, axles, and shifter linkages. Fill The radiator, engine, power steering reservoir and tranny with their respective fluids.
ALMOST THERE!!!!!
We have two more things to deal with: The throttle body and fuel.
Throttle body: The 3.5 uses a drive-by-wire system that the 4th gen simply doesn’t have, so you’re going to have to make your own bracket to house the throttle position sensor, and throttle cable. First you break the housing of the drive-by-wire system, then you take out EVERYTHING. This should leave you with a rod that you can mount your 3.0 throttle wire bracket to. There’s a little piece of metal that you must use, in conjunction with a lock nut to keep it all in place. I made a bracket out of metal, secured it with bolts, and put the throttle position sensor on that. The hardest part is making the throttle position sensor turn cleanly with the throttle body. You also have to make a bracket to hold the throttle cable in place. Any piece of scrap metal cut to shape will fit. Use your imagination.
This is how mine came out:
)
Fuel:
The Vq35 uses a returnless fuel system, and the 4th gen has a return system. The solution?
Get a tee and adjustable fuel pressure regulator ($25 shipped on eBay), and run the fuel lines like this:
………………… Adjustable FPR set to 52psi —-return line
…………………………..|
Feed—-fuel filter—–tee —– fuel rail
Now make sure you have everything connected, wired up, and sealed.
*FINAL CHECKS*
You can use your stock air box, with a coupler or two. Connect all vacuum lines, including PCV and brake booster to the rear of the intake manifold. Connect the starter, and all grounds.
Connect the battery terminals, and start the car. It should be a little rough starting in the beginning, but it should run pretty well. Let all the carbon and grime burn off, and make sure to give it a tune up after 1000 miles.
Notice I didn’t include a guide on how to hook up the variable intake manifold. I did so for a reason – I didn’t use it. I modified my intake manifold (dubbed V-Spec), so I have more air volume at all rpms. If you want this done, please inquire.
)
Afterthoughts
Any ECU will work with this swap, I’m running a 1998 auto ECU (stock), but I do have some Check Engine lights. Personally, they don’t bother me, but a bit more work and planning has to go into the swap if you don’t want check engine lights. I have codes for the IACV (not connected), and EVAP system (not connected)
You cannot use a strut bar with the 3.5, the manifold sits too high. I’m currently working a way around that, however.
How long does this swap take?
Mine took about 4 days, doing everything carefully, but it can be done over a long weekend. There was a point where I had both engines taken apart, where it was a bit overwhelming, and I thought “I’m not going to have a car to drive next week”, but you get over it when you’re working at a steady pace.
Is it worth it?
In one word: Definitely.
Thanks:
NYCMAXIMAS.ORG – Can’t thank you enough.
Vipervadim – couldn’t have done it without him & his green tea!!!! He’s very knowledgeable, and I’m glad to have him as a friend.
*~Dark~* -He built by engine hoist while we were taking apart the car, saving precious time. He also offered his help here and there. Thanks!
Tilleys99 – For making the cam adapters
M&RMAX – For giving me an awesome deal on the VQ35’s I bought. – It was my first experience with Rob and it definitely won’t be my last!
CMAX – For giving me advice over the phone about the shifter linkage and clutch
Meccanoble – For giving me a new shifter bushing, and helping me with the same problem
Liquidvenom – For using his strength in lifting my tranny and aligning it with the car. Thanks, Will!
SMX95 – For helping me with any questions I had automotive related
Krismax – father of the 00vi – for letting me drive his vq35 4th gen and getting me hooked!!
Should you have any questions, PM me on nycmaximas.org or maxima.org, username tavarish.
—REP POINTS VERY MUCH APPRECIATED!
..it is a work in progress, so some info may change if anyone finds a mistake.
Thanks,
-Freddy
Credit: www.vqpower.com